July 27, 2015

Frooster the Fruit Rooster

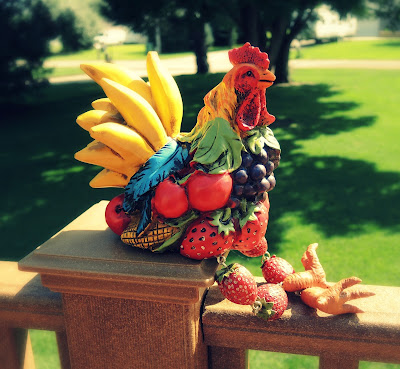
Frooster the fruit rooster.

One of my favorite things to do on a Saturday morning is to go treasure hunting at garage sales with my cousin, Amy.  You just never know what you're going to find, and nothing demonstrates that better than a fruit rooster.  Yes, my friends, I found this little gem hidden amid some mismatched glassware and a Hello Kitty lunchbox.  My daughter just rolled her eyes and called me a child when I showed it to her, but seriously, how can you not be fascinated with this thing?  Think about it - how to you suppose the conversation went when someone was thinking it up:
CEO:  What pieces do you think we should add to the ceramic figurine line this season?  I'm thinking the smiling strawberries and the dancing mouse in a lace cap did pretty well last year.
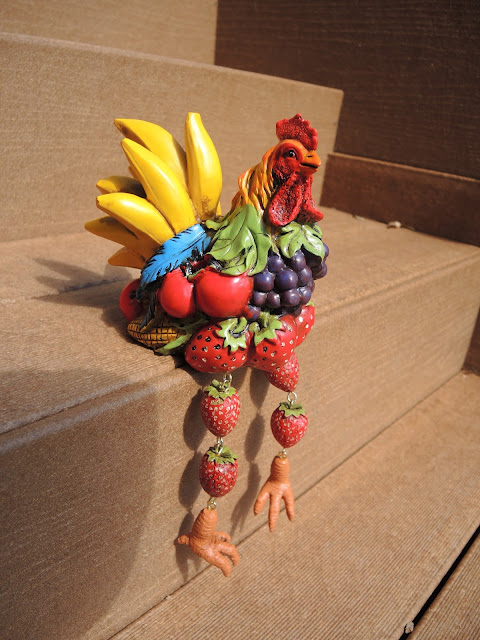
IDEA DUDE:  How about a chicken with a body made out of fruit.  We'll do a bunch of grapes for the main body piece, dangling strawberries for the legs and a bunch of bananas all fanned out for the tail.  Oh, oh, oh - I know!  We'll add a couple ears of corn at the bottom and tuck in a few random feathers.  Maybe bright blue feathers!  Then we'll stick on a realistic chicken head and feet and it'll be great!
CEO:  You know bananas don't actually grow that way, right?  They grow in nice neat bunches, not all willy nilly like that.
IDEA DUDE:  Really?  I'm building a fruit rooster here and you're worried about realistic banana growth patterns?
Frooster the fruit rooster on the stairs.

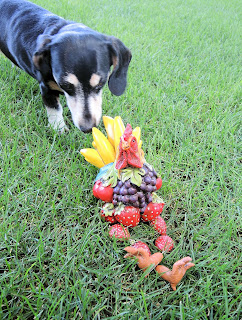
I got really bored later and decided to do a little photo shoot with Frooster (what?  What else would you name a fruit rooster?).  Doggie was pretty curious:

Frooster the fruit rooster meeting Doggie.

 But Frooster's engaging personality won her over:

Frooster the fruit rooster riding Doggie.

We broke for lunch, but Frooster was disturbed by my husband's choice:

Frooster the fruit rooster considering KFC.

So we moved on to some glamour shots.

Frooster the fruit rooster striking a sexy pose.

 My family plays the White Elephant gift game (maybe you call it Dirty Santa?) at Christmas.  We usually set the limit at five bucks and then have a pretty good time stealing gifts and fighting over things like giant jars of pickles or a bottle opener key chain.  I'm thinking this is going to be the best gift ever!  I can picture it now - Frooster returning to our game year after year and everybody picking the smallest gifts first because they know those couldn't be him.  Yes, my new pal, Frooster, and I are going to have a lot of fun together.

Frooster the fruit rooster with a twinkle in his eye.


July 23, 2015

How to Finish a Macrame Piece with a Ring: A Free Tutorial

Micro macrame closure with knotting around a ring.

One question I hear quite a bit is about how I finish off many of my micro macrame pieces.  I often use a split ring and clasp method.  I like finished look it gives my macrame bracelets, the security the lobster clasps provide and the fact that I can make a piece adjustable by adding an extender chain.  I've covered how to do this technique in many of my classes and tutorials, but I thought I'd put it here for easier reference or for folks who are only looking for this tidbit of information.  

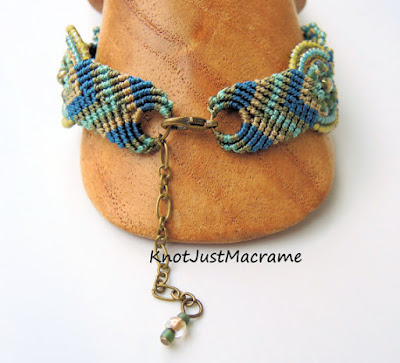
Reverse side of macrame bracele

This method works best if your macrame design ends with a "v" shape for the ring to nestle down into.  I use split rings rather than jump rings for the security (the small cords I use have a tendency to escape jump rings, no matter how tightly I think I have them closed).  Closed or soldered rings will work as well.  I add the clasp to my split ring before knotting.  Start by turning the piece over.  We'll be knotting this part from the reverse side and attaching each of the cords to the split ring using a larks head knot.

Making a larks head knot around a split ring.

Tying a larks head knot around a ring is the same as tying one around a cord.  Make the first half of the knot by bringing the cord through the top of the ring and back through the cord loop.  Tighten the first half and then complete the second half of the same knot by bringing the cord up through the back of the ring and through the cord loop.  I tie the cords starting from the center and working out to one side, then back to the center and out to the other side to help keep the ring centered in the bracelet.  If you flip your piece over at the half way mark, it should look like this:

Front side at half way point.

When you've attached all of the cords, the back should look like this:

Reverse side after all cords are attached to ring.

When you flip it back to the front side then, it should look like this:

Front side of macrame after attaching all cords.

If you get stuck, just remember that you are making a larks head knot, just substituting a split ring for the holding cord you would normally be using.  This video might help, too:


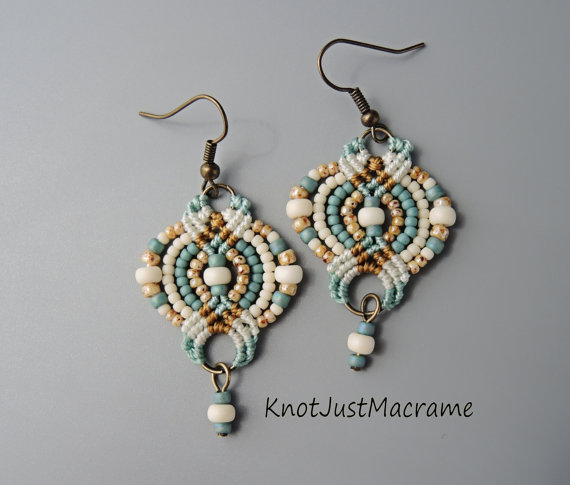
This technique is useful for finishing all sorts of micro macrame pieces, not just bracelets.  I use it on earrings, too:

Micro macrame earrings by Sherri Stokey of Knot Just Macrame.

Hopefully this tutorial will help somebody somewhere down the line.  My little way of paying it forward.  If you like what you see here and you'd like to learn more, check out my micro macrame tutorials on Etsy or one of the many online macrame classes I offer at CraftArtEdu.  Happy knotting!!


July 14, 2015

A Quick Update

Micro macrame class with Sherri Stokey
 
Just look at the concentration on those faces!  I did a workshop in Colorado Springs this past weekend and the students were awesome.  Peg, the lady who got me started doing online classes for CraftArtEdu, is the one who set up the class and I was really excited to get to meet her in person (that's her in the bottom right photo, far right).  Another online friend, Shane (next to Peg in the photo), was also there - you might remember these beads she made for me:

Polymer clay beads by Shane Smith

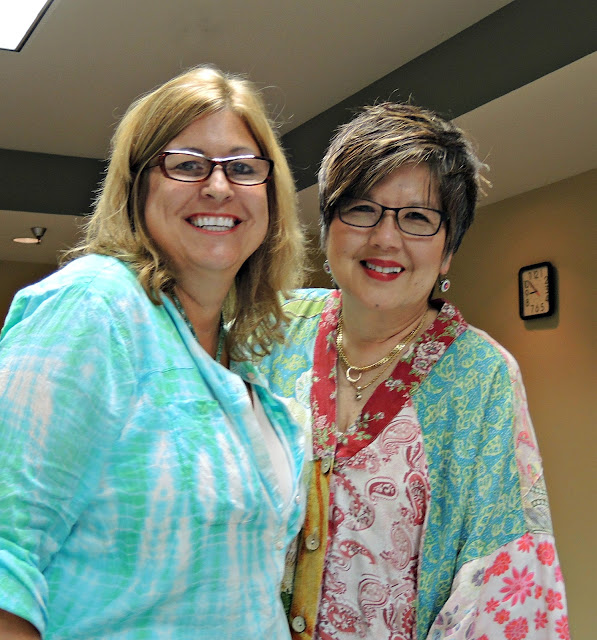
It was the first time Shane and I got to actually meet, too.  And then the fabulous Donna Kato dropped by the class to say "hi"!

Sherri Stokey and Donna Kato

I have to admit, I was a little starstruck.  She's a big deal!  This woman is a dynamo - a world class teacher, author, polymer clay guru and co-founder of CraftArtEdu.  Busy lady!  

While I was gadding around Colorado Springs (I did find time to do some shopping, try some fun restaurants and hit the Renaissance Festival), I missed the release of Nadja Shield's new class!

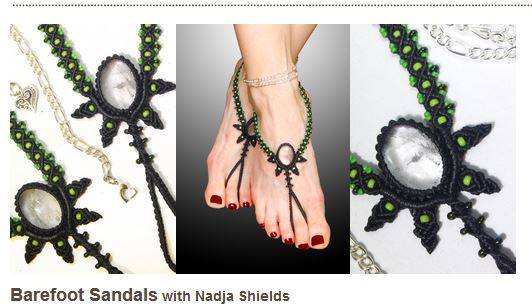
Barefoot Sandals class by Nadja Shields at CraftArtEdu

Aren't those fun!?  Anyone who's known me for five minutes knows I hate wearing shoes.  One of the guys at work called me the Imelda Marcos of sandals (insert blushing emoticon here).  It stands to reason, then, that I would LOVE Nadja's new project - Barefoot Sandals!  The class is here, if you're interested, and if you hurry, you can get 30% off on ANY of the online micro macrame classes at CraftArtEdu (good through midnight CT, July 14, 2015, no coupon necessary).

Summer is just flying by for me but I'm loving every minute of it.  I hope you are getting a chance to enjoy it, too!

July 2, 2015

Beading Back in Time - Early Civilization Blog Hop Challenge

Beading Back in Time Dawn of Civilization Blog Hop

Do you remember way back in January when I first told you about a series of blog hops my friend Lindsay Starr and I were going to host?  No?  Not to worry (my memory isn't always so great either) - you can always follow this link to the original post and refresh your memory.  We started with the Pre-Human Edition and then moved on to the Early Human Edition.  For the third round, we'll be taking our inspiration from the early civilizations.  And boy, is there a lot to choose from!

Sumerian writing - account of silver for the governor (public domain)

The first written language appeared near the beginning of this period. It's generally agreed that the ancient Sumerians invented it about 3200 BC and the picture above is an example of Sumerian text.  These guys weren't just sitting around admiring their penmanship, either.  They were doing things like inventing the wheel and plow; making advances in arithmetic and geometry; and studying astronomy, chemistry and medicine. 

The Sphyinx and the Pyramid of Cheops in Egypt (public domain)

The folks in Egypt were keepin' up with the Jones', too.  They'd built the Great Pyramid at Giza and the Sphinx before the mammoths even went extinct!

Wooly mammoths (public domain)

Just think about that for a minute.  That's a long time ago and those structures are still standing.  If that's not truly awe inspiring, I don't know what is.  They were also inventing a calendar with 365 days and 12 months, a system of written numbers and a form of geometry, and practicing medicine.

Indus Valley seals (public domain)

The Indus Valley Civilization was another of the big ones, and the most wide spread in the Old World at the time.  Their engineers created plumbing and sewage systems and they built houses of brick with bathrooms!  And flush toilets!

Prologue to the Hammurabi Code at the Louvre (public domain)

Over in ancient Babylon, King Hammurabi came up with the oldest existing code of laws.  This guy put 282 laws covering all aspects of life in writing.  His goal was for government to take responsibility for order and justice, and if you think about it, that's a big deal for any civilization.

Minoan Master of Animals (public domain)

The arts were flourishing in these civilizations as well, with some breathtaking jewelry in the mix like the Minoan Master of Animals shown above or the Egyptian pendant below:

Egyptian pendant (public domain)

How's that for a bunch of inspiration?  Our challenge is to create something inspired by this theme:  the Dawn of Civilization.  Use any medium you like and draw inspiration however you like, whether it's a certain civilization, a style, or even a specific material (got any gold laying around?).  Then meet Lindsay and I back here on August 1st to see what everyone made.
And most of all, remember to have fun with it!

Related Posts Plugin for WordPress, Blogger...